How to Install Gutters on Your Home (6-Step DIY Guide)
Date Posted: 03/04/25
Time To Read: 10 mins
Written By: Jocelyn Frazier
Gutter installation is a crucial home improvement project that protects your home from water damage and ensures proper drainage. While it might seem like a daunting task, with the right tools and steps, it’s an achievable DIY project for homeowners. This guide will walk you through the benefits of gutters and provide comprehensive, step-by-step instructions on how to install gutters on your home. Here’s what you’ll learn.
- Why gutters are essential for your home
- Step-by-step instructions on how to install gutters
- Expert tips for a smooth installation process
🤔 Why Gutters are a Vital Part of Your Home
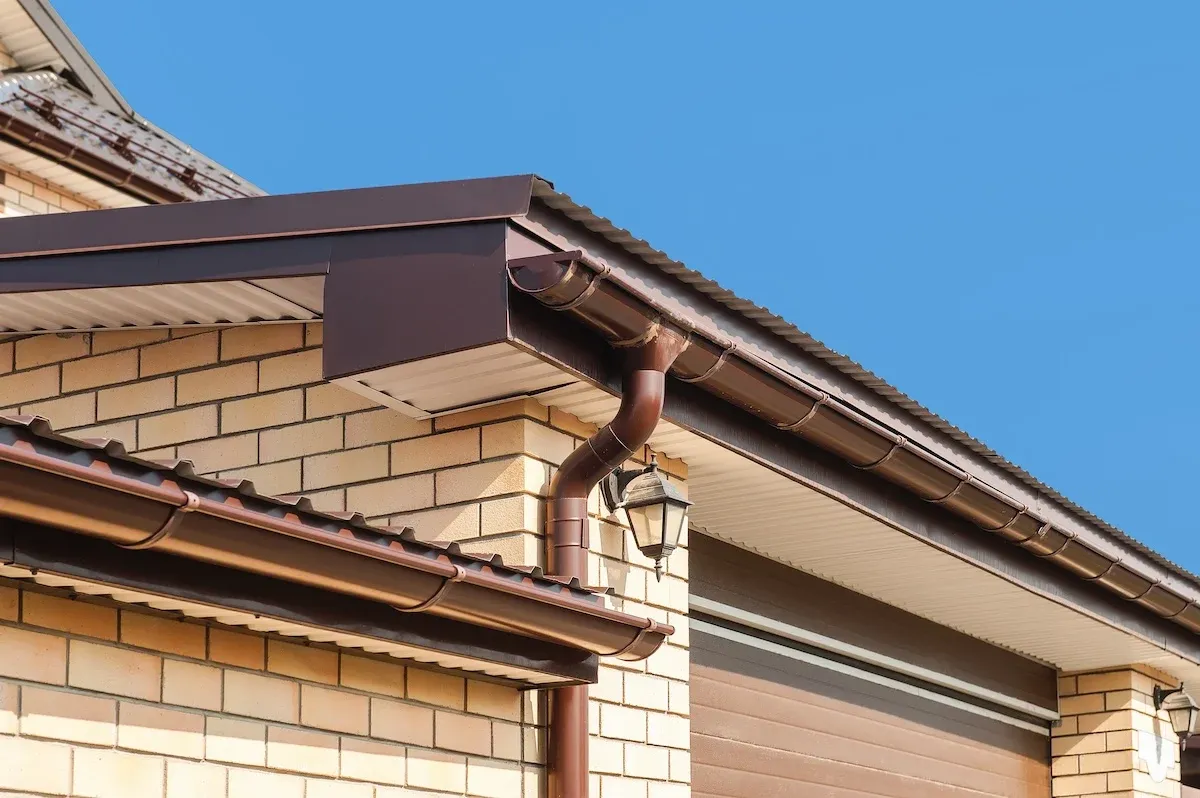
Gutters play a crucial role in diverting rainwater away from your home’s foundation, protecting it from damage and erosion. Additionally, gutters prevent mold, mildew, and water stains on your siding, keeping your home structurally sound and visually appealing. The right gutter system is not just functional; it can also complement your home’s aesthetics.
If you’re ready to take on this project yourself, follow our DIY guide below. If not, our experienced team at Altimate Outdoor is always here to help!
Tools & Materials You’ll Need
Before starting, make sure you have the following:
- Gutters and downspouts
- Measuring tape
- Chalk line
- Ladder
- Hacksaw
- Drill
- Gutter screws
- Sealant
1 Year deferred interest with no payments
Transform your outdoor living space with us! Fill out the form below to get started on your upgrade.
Our Outdoor Living Guide
Gutter installation is a crucial home improvement project that protects your home from water damage and ensures proper drainage...
Open and exposed patios are available for the majority of the year in places like Florida and California, where the sun is usually out and temperatures don’t change drastically through the seasons...

Gutters might not be the first thing you think of when it comes to home improvement, but they’re a critical aspect of protecting your property...

✅ 6 Easy Steps to Install Gutters
Proper gutter installation is crucial for protecting your home from water damage by directing rainwater away from the foundation. Follow these 6 easy steps to ensure your gutters are installed correctly and keep your home safe.
1. Measure Your Roofline
The first step in installing gutters is to measure the length of your roofline accurately. Start by using a sturdy measuring tape to determine the full length of the areas where you plan to install gutters. Be sure to take precise measurements and account for any corners, bends, or unique sections of your roofline, as these will require additional materials such as corner connectors or specialized sections. Write down all measurements carefully, including the lengths of straight sections and the dimensions of angled or curved areas. Proper measurements will help you calculate how many gutter sections, brackets, and connectors you’ll need to cover the entire roofline efficiently. If you’re unsure about how to measure certain areas, consider sketching a rough diagram of your roofline to visualize the process and avoid mistakes. Taking the time to measure accurately will save you from purchasing too many or too few materials and ensure a smoother installation process later.
2. Plan Your Gutter Slope
Proper water drainage is essential for a functional gutter system, and achieving the correct slope is a critical step. Gutters need to be installed with a slight slope to direct water toward the downspouts. The general guideline is to allow for a slope of ¼ inch for every 10 feet of gutter length. Start by identifying the highest points of your roofline and marking them. Next, determine where the downspouts will be positioned, typically at the lowest points of the slope. Use a chalk line to create a straight and visible guide along the roofline that represents this slope. This line will serve as your reference when installing the brackets and gutter sections. Without a proper slope, water can pool in the gutters, leading to clogs, leaks, or structural damage over time. Carefully planning and marking the slope ensures efficient water drainage and reduces the risk of issues in the future.
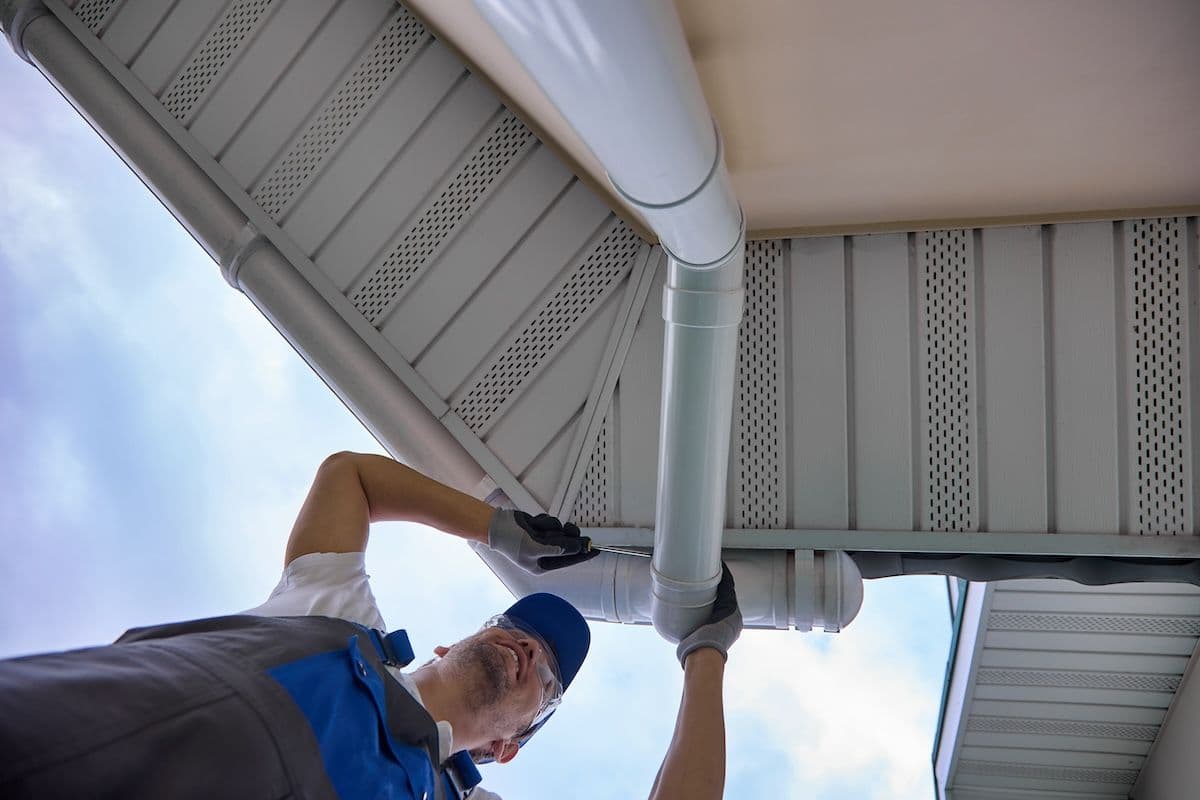
3. Install Gutter Brackets
The gutter brackets are essential components that secure the gutter system to your roofline. Once you’ve marked the slope with a chalk line, begin installing the brackets along the roof’s fascia board. Use a drill and corrosion-resistant screws to attach each bracket firmly. Space the brackets approximately 3 feet apart to provide adequate support, but closer spacing may be necessary in areas prone to heavy rain or snow loads. Make sure each bracket aligns with the slope marked earlier to maintain proper drainage. When installing brackets near corners or bends, take extra care to ensure they are placed at the correct angles to accommodate the gutter pieces. Double-check the stability of each bracket before moving on to the next one, as securely installed brackets are vital for the durability of your gutter system. Poorly installed brackets can lead to sagging gutters or water overflow during storms, so take your time to get this step right.
4. Cut and Fit the Gutter Sections
Once the brackets are in place, it’s time to prepare the gutter sections. Begin by measuring each section of the roofline and marking the corresponding lengths on the gutter pieces. Use a hacksaw or a power saw with a metal-cutting blade to cut the gutters to the appropriate sizes. Be sure to wear safety gloves and goggles to protect yourself during this process. After cutting, test-fit each gutter section along the roofline to ensure it fits snugly into the brackets. For longer rooflines, you’ll need to join multiple gutter sections together using gutter connectors or sealant for a secure fit. Make sure the sections align perfectly with the chalk line slope to maintain proper water flow. Pay extra attention to corners and angled sections, as these areas require precise cuts and careful assembly. Once all sections are prepared and fitted, secure them into the brackets, checking for stability and alignment. Properly fitted gutters ensure seamless water drainage and a clean, professional appearance.
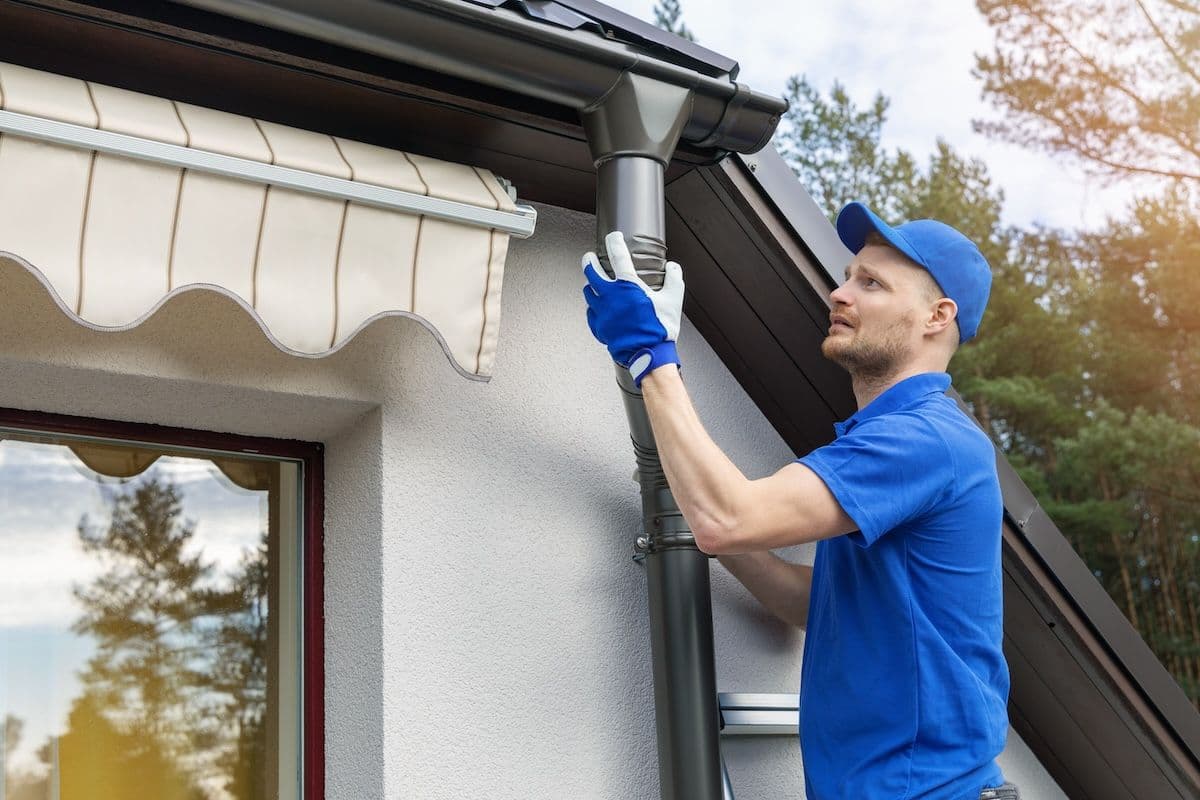
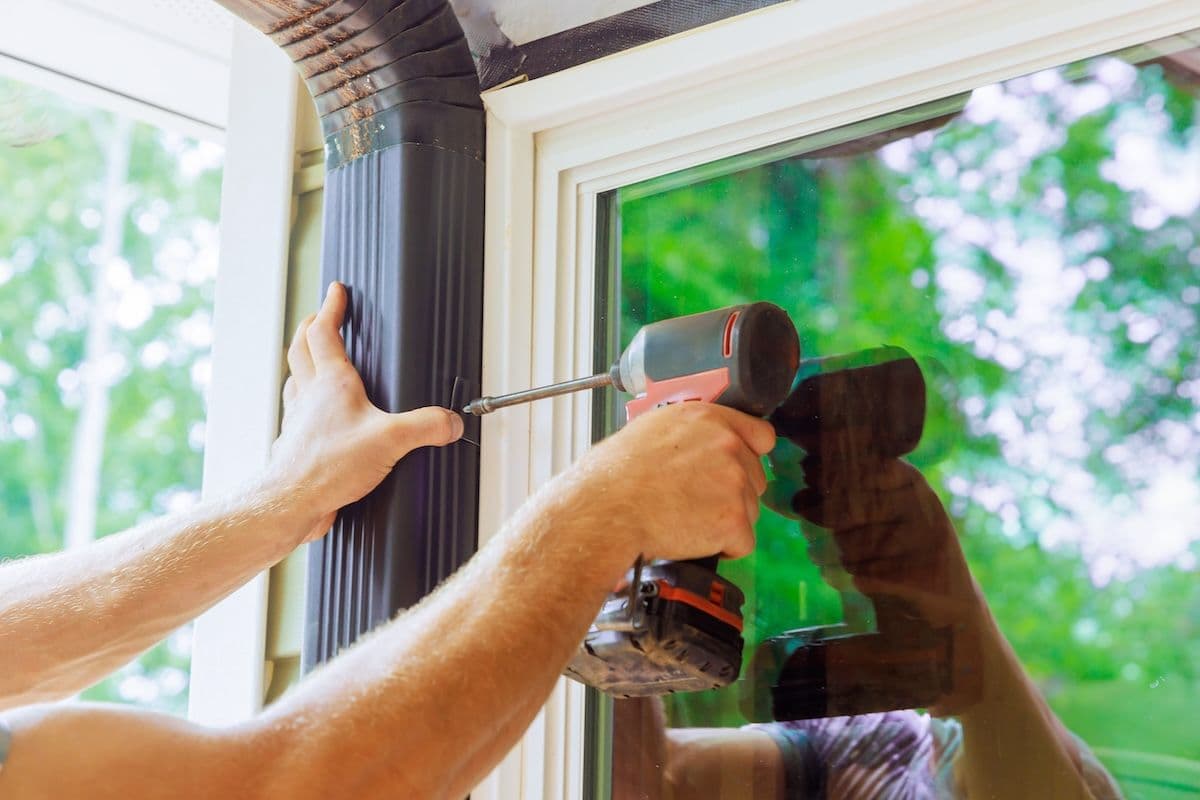
5. Attach Downspouts
Downspouts are crucial for directing water away from your home’s foundation, preventing floods and water damage. Start by selecting the ideal locations for the downspouts, which should correspond to the lowest points of the gutter slope. Use a hole saw or similar tool to cut circular holes in the bottom of the gutter sections where the downspouts will be attached. Install downspout outlets over these holes and secure them with screws or rivets. Next, attach the downspouts to the outlets using screws or specialized connectors, ensuring a tight and secure fit. Each downspout should extend at least 6 feet away from your home’s foundation to direct water safely and prevent pooling. Use elbow joints or extensions as needed to navigate around obstacles or direct water flow in a specific direction. Check that the downspouts are securely fastened to the wall of your home using brackets or straps spaced every few feet. Properly installed downspouts are essential for preventing water from damaging your home’s structure or landscaping.
6. Seal and Test Your Gutters
With the gutters and downspouts installed, the final step is to seal and test the system to ensure it functions correctly. Apply a high-quality waterproof sealant to all joints, seams, and connections in the gutter system. Be thorough, as even small gaps can lead to leaks and reduce the efficiency of the gutters. Allow the sealant to dry according to the manufacturer’s instructions before testing the system. Once the sealant is set, use a garden hose to run water through the gutters, starting at the highest point of the slope. Watch closely to ensure the water flows smoothly toward the downspouts without pooling or spilling over the edges. Check all seams and connections for leaks, and address any issues immediately by applying additional sealant or re-securing loose sections. Testing the system is a crucial step that ensures your gutters are ready to handle rainwater effectively. A well-sealed, properly functioning gutter system will protect your home from water damage for years to come.
👉 How to Pick the Right Gutters for Your Home
Choosing the right gutters is essential to protect your home from water damage and maintain its structural integrity. The right gutters ensure proper drainage, preventing costly repairs down the line.
Choosing the Right Gutters for Your Home
Selecting the best gutters for your home is a crucial decision that can save you time, money, and potential repair headaches in the future. Properly chosen gutters not only protect your home from water damage but also reduce the need for frequent maintenance. Here’s what you need to know to make an informed choice.
Consider the Material
When it comes to gutter materials, you have several options to choose from, each with its own benefits and drawbacks. Common choices include aluminum, steel, vinyl, and copper.
Aluminum is one of the most popular options for homeowners due to its lightweight nature, rust resistance, and affordability. It’s a reliable choice for those seeking a balance between performance and cost. Steel, on the other hand, is highly durable and can withstand harsh weather conditions, but it requires regular maintenance to prevent rust from forming over time. Vinyl gutters are the most budget-friendly option and are easy to install, but they may not perform well in extreme climates, as they can crack or warp under pressure. Copper gutters are a premium choice, offering unmatched longevity and an elegant aesthetic. However, they come with a significantly higher price tag, making them a luxurious investment for your home.
Think About Style and Size
The style and size of your gutters play an important role in their functionality and appearance. Two of the most common styles are K-style and half-round gutters, each offering unique advantages.
K-style gutters have a more modern appearance and are designed to handle larger volumes of water, making them ideal for homes in areas with heavy rainfall. Their flat back and decorative front also make them a practical yet stylish choice. Half-round gutters, on the other hand, provide a classic and traditional look, perfect for historic or rustic homes. They are also easier to clean due to their simple, open shape, though they may not handle water as efficiently as K-style options.
Don’t Forget Additional Features
When selecting gutters, it’s easy to overlook the importance of additional features that can enhance their performance and reduce maintenance needs. Leaf guards and gutter screens, for example, are excellent additions that prevent debris from clogging your gutters. These features can save you time and effort by reducing the frequency of cleaning, while also ensuring water flows freely through the system during storms.
Tailoring Gutters to Your Home
By carefully considering the material, style, size, and additional features, you can choose gutters that are perfectly tailored to your home’s specific needs and environmental conditions. This thoughtful selection process will not only ensure optimal performance but also provide long-term protection for your home. Investing in the right gutters today can save you from costly repairs and maintenance in the future, giving you peace of mind for years to come.
🏠 Gutter Installation Guide
Installing gutters can be a complex and time-consuming task, requiring the right tools, skills, and expertise to ensure the job is done properly. That’s why trusting the professionals at Altimate Outdoor is the smart choice. With our commitment to expert craftsmanship, affordable solutions, and a proven track record of customer satisfaction, we make protecting your home simple and stress-free.
Don’t leave your gutters to chance—contact Altimate Outdoor today for a free consultation and let us handle the hard work for you!
How Our Customers Get Outdoors

“Altimate did a great job communicating with me, throughout my project. Their attention to detail made all the difference and I highly recommend meeting with them!”
Danny W.

“We had retractable screens installed on our outdoor porch and could not be happier. The screens have made our porch another living space and affords us privacy on a busy golf course. We would highly recommend and were impressed with the turnaround time and professionalism from start to finish.”
Francis S.

“They put up my Struxure X outdoor pergola. I couldn't be happier. The product is amazing. The individuals involved in putting it up were all very kind, professional, and hard working! I WILL have them build SE fore again!”
Michael M.

“Great company, they have been working hard for years. Great example of what a company is supposed to be. Family oriented and quality customer service is a must.”
Eric H.

“Excellent experience, quality installation and communication. Friendly workers and total cleanup of work site. Two thumbs up.”
Frank B.

“They installed the StruXure pergola. They were very neat and professional. Had a minor problem and they came and fixed it.”
Ann S.

“Wait time was not as long as they said. They got the job done quickly and quietly.”
Melanie S.

“I was so impressed with their professional installation. They removed my old spouting and downspouts. They recommended the 6” spouting to handle our 2100 square foot ranch home. After seeing how nice it looks I should have done it years ago. I would highly recommend them.”
Tony A.

“We had a pergola put in a couple years ago and absolutely love it. I had a question today and sent a msg to them....recieved a call back within 30 minutes with a solution! Amazing and Best Customer Service Around! Thank you!!”
Becky S.
Answering Your Outdoor Living Questions
Our business was founded with customer satisfaction in mind. Not only do we have the skills to build a beautiful outdoor space, but we also don’t rest until it is exactly to your satisfaction.
Contact us either through our website or by phone, and one of our trained customer service professionals will assist you in scheduling your appointment.
Yes. Our in-house design team offers complementary design consultations.
Yes, we offer financing through Greensky! Take a look at our financing page for more information.
Start Your Outdoor Living Journey Today
Contact Us
-1440x794.png&w=3840&q=75&dpl=dpl_4wVoGnxVCsr9mYvwZHDv3jATJnko)
Mon-Fri: 8:00am-4:30pm
Sat-Sun: Closed
Mon-Fri: 8:00am-4:30pm
Sat-Sun: Closed